I’ve been meaning to migrate my blog off Tumblr for a while now, and on to Github pages. Why? I don’t like the writing/editing interface for text in Tumblr (the window is too small to be able to see much text) - certain bits of html disappear between the visual editor and the html editor - it’s difficult to use images or put code snippets in, and I want to be able to write in Markdown, to name just a few reasons. I also like the idea of creating lists or resources that other people can contribute to - ie. via Github - that can live on my site, and I want to be able to customise it a little more easily than Tumblr offers.
So, here goes.
First, I set up a new repository on Github: I followed these instructions up until Step 3.
Then, on my machine I created a folder where I want the blog to live - imaginatively, called ‘blog’.
In the terminal, I [changed directory](https://github.com/0nn0/terminal-mac-cheatsheet/wiki/Terminal-Cheatsheet-for-Mac-(-basics-) to be in /blog - so that everything I then do happens in the right place.
then ran
git clone https://github.com/zararah/zararah.github.ioNext, as I knew that I wanted my new page to run on Jekyll, I checked out the documentation from here.
This told me to run:
gem install jekyll(bearing in mind I’ve already worked with ruby and Jekyll before, so I had all the requirements already
But, for some reason, I got the following error:
ERROR:  While executing gem ... (Gem::FilePermissionError)
    You don't have write permissions for the /Library/Ruby/Gems/2.0.0 directory.
I have no idea why I didn’t have the write permissions, so I used sudo instead, and ran:
sudo gem install jekylland then
sudo gem install github-pagesto make sure everything else was up to date. -
Both seemed to do make something happen in the Terminal - a good sign, I think!
Next, I thought it might be time to think about what kind of theme I wanted to use. I found this page with a variety of Jekyll themes that I could fork. I liked this one - but it’s more focused on pictures, rather than writing. Or this one, but it looks a lot like Medium. I thought this one was nice, too - but at the risk of sounding like Goldilocks, nothing was quite right.
So, as Friedrich pointed out, why not take this opportunity to make my own? A challenge, but a good learning opportunity, too.
Perhaps a decision I’ll regret, but here goes:
I was very happy to find this excellent tutorial on building a Jekyll blog from scratch, which I pretty much followed word for word. There were a few things that are now out of date though, which I’ve noted down here in case others have the same problem.
If you open the link above to the tutorial - everything seems to work until I tried running
jekyll --auto --serverIt turns out that there’s been a deprecation of this command: I got
zaras-air:zararah.github.io zararahman$ jekyll --auto --server
       Deprecation: Jekyll now uses subcommands instead of just switches. Run `jekyll --help' to find out more.
       Deprecation: The --server command has been replaced by the 'serve' subcommand.
       Deprecation: The switch '--auto' has been replaced with '--watch'.
so, instead I ran:
jekyll serve -wto get the local server running, instead - the -w means that it updates automatically, without needing to update changes.
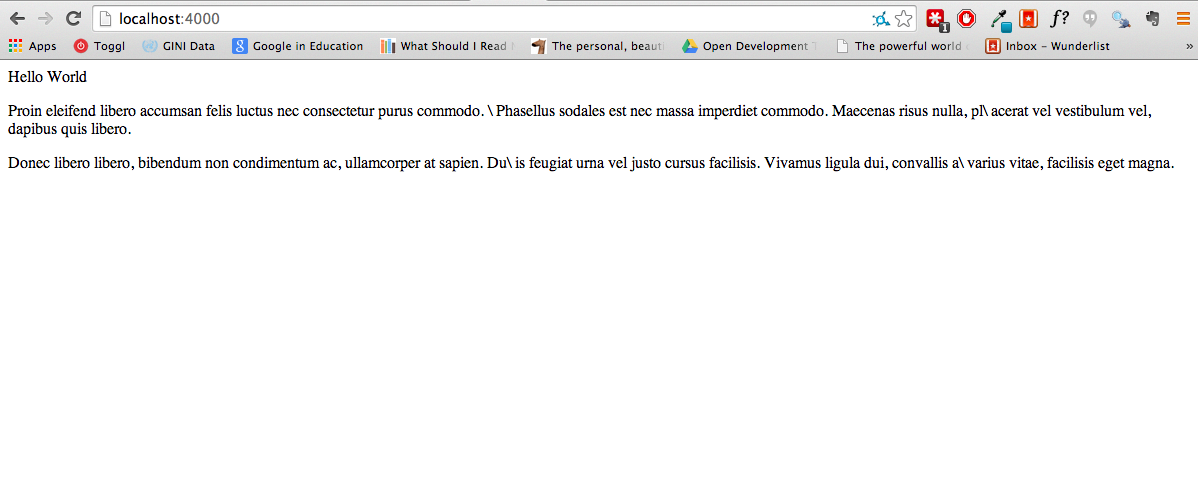
And it worked! I can see…
So on to the next step of building the theme, and installing Twitter Bootstrap - (see section Building the Theme in Andrew’s tutorial)
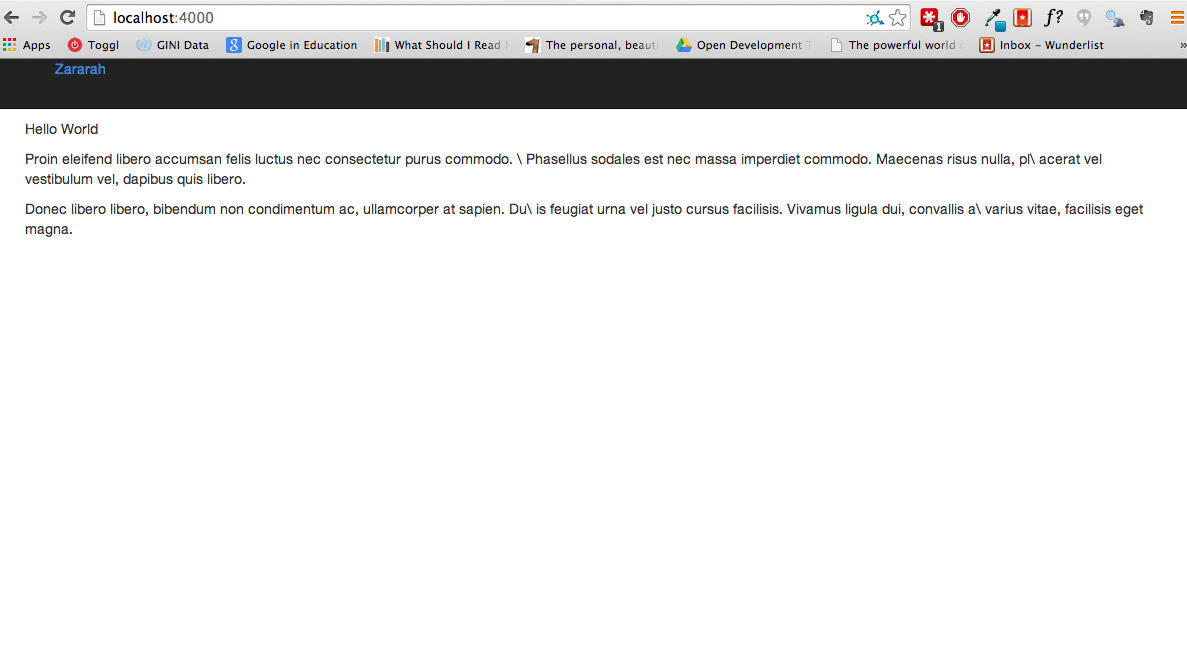
Now I can see:
To set up a sidebar though, I ran into a couple of issues as I’m using bootstrap v. 3.2.0 - which is newer than the tutorial.
So instead of the recommended sidebar.html, I put
{% include header.html %}
  <div class="row">
  	 <div class="col-md-8">
    {{ content }}
  </div>
  <div class="col-md-4">
    {% include sidebar.html %}
  </div>
</div>
{% include footer.html %}
after referring to the new bootstrap documentation.
(Incidentally, correcting:
<div class="row-fluid">
  <div class="span12">
to
<div class=”row”>
  <div class=”col-md-12”>
(or whatever number you want) is something that you’ll have to do throughout the tutorial, if you’re using the newer version of Bootstrap.
Also, within the code there for post.html I found something that didn’t seem to work - the date_to_long_string here:
  {% include header.html %}

<div class="row-fluid">
  <div class="span8">
    <h1>{{ page.title }}</h1>
    <p class="muted">{{ page.date | date_to_long_string }}</p>

    {{ content }}
  </div>
  <div class="span4">
    {% include sidebar.html %}
  </div>
</div>

{% include footer.html %}```
…so I deleted the date_to_long_string
and I changed it to
<p class="muted">26 October 2014</p>following advice from here.
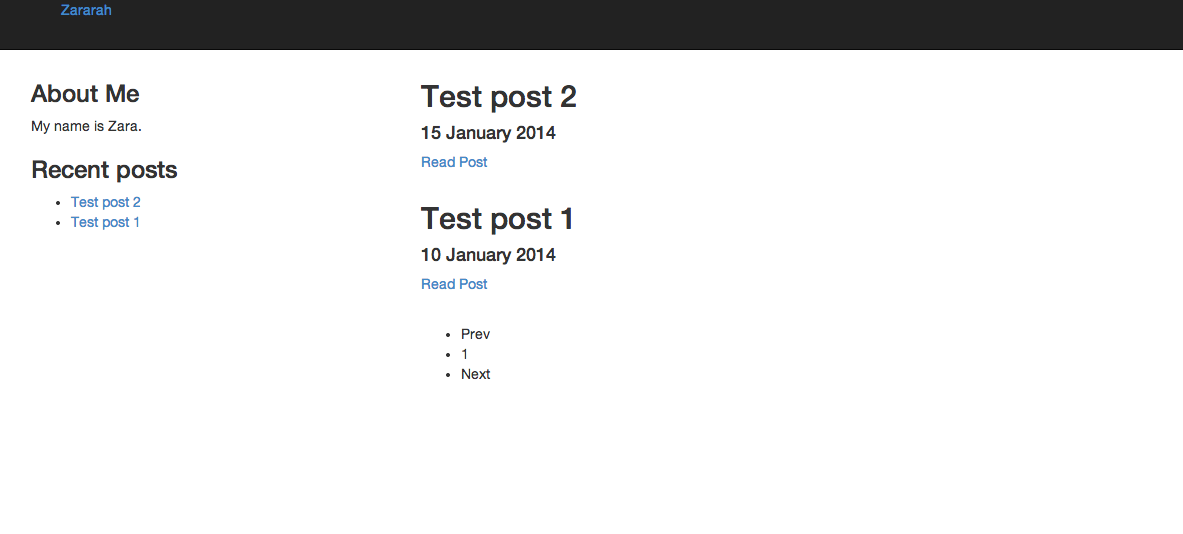
And, everything else in the tutorial worked splendidly, and left me with this very basic skeleton of a blog, which looked something like this:
Next up - customising it…